
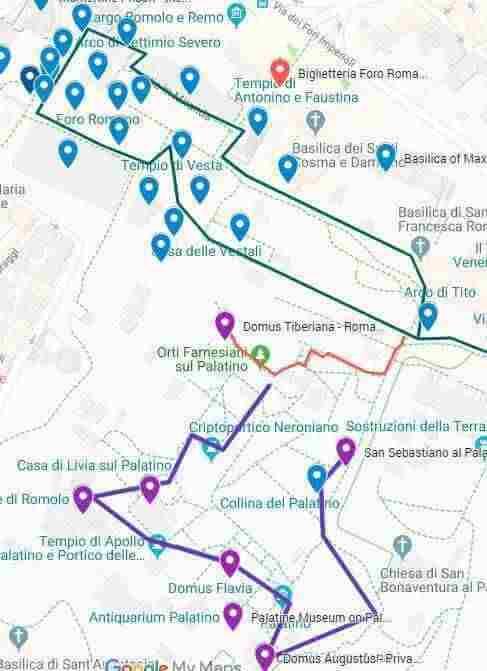
Use the map and attractions guide to visit the Palatine Hill and the Roman Forum . The map of the Roman Forum follows the attractions guide in the link below which is a complete guide to the ruins at the Forum and Palatine Hill (ancient Roman ruins). Follow the walking routes for attractions at the roman forum. Explore both locations at your own place and spend a few hours or a full day. Click on the arrow icon to the left of the title to display the legend. Click on the map pins (blue and green pins) on the interactive map below, or on the legend or the PDF map that you download for additional information including images of the attraction
Accompanying attractions guide is HERE
Download the PDF map above HERE
Click on map image for attractions guide to Roman Forum and Palatine Hills
Other Sites in Italy
- Visit the Roman Colosseum. Click on the Roman Colosseum attractions map HERE and accompanying Colosseum attractions guide HERE
- Take the Rome attractions map and self guided tour: It includes the Vatican City attractions map HERE and the Vatican attractions guide HERE
- Self Guided Walking tour to explore the neighborhood of Trastevere with map of attractions HERE and guide of attractions HERE
- Visit St Peters Basilica. Explore all the attractions in St Peter’s Basilica with the attractions guide HERE
- One of my favorite places is the Roman Forum and Palatine Hill. The map of attractions is HERE and the self guided walking tour is HERE
- Self Guided Walking Tours – Day Trips from Rome
Instructions to download the interactive map to a smart phone:
Take the Map with you when you travel:
Instructions on:
- Using it offline
- Using it online – We bring one of our older smart phones when we travel and buy a local SIM card. You can purchase a local tourist SIM card from one of the main local providers, they are usually pretty inexpensive. You may need your passport to purchase as its a tourist SIM if you are an international tourist. You should have them put it in your old smartphone and check that it works before leaving the store. Use it to follow the map online, its the best way to explore
Sign into google using your Gmail account on your smart phone and be connected to the internet. If you do not sign in, this process will not work. You will be downloading this map to save it. You will be saving it in google maps in two places:
- Save in “Your Places” for online use and
- Save in “Offline map” for offline use
- Youtube instructions on link as follows:
https://youtu.be/_6j9koieMsU
Instructions to save above map:
- Click on the rectangle on the top right hand side of the above map [ ] – if you move your mouse to it, it will say “view larger map”
- It will take you into google maps on your smartphone and it will automatically save this map. You must be already be signed into google maps with your Gmail account, if you are not signed into google maps then the map will not be saved
- In google maps, click on the menu which is the three horizontal lines on the top left of the google map (it is to the left of the search box)
- From the menu, click on “Your Places”. This will take you to another screen with a menu at the top. From the top menu bar select “maps”. A list of your maps will be displayed including the map that was just saved. Select the map you just saved
- Make sure the map is still onscreen; do not close out of it as you will be downloading this map and it has to be onscreen to download. While the map is onscreen, click on menu again (three horizontal lines top left hand corner)
- Select “Offline maps” then select “custom map”
- Once you select “custom map”, the onscreen map will be displayed; select the area you want downloaded (zoom in or out to get all the data points into the blue square outline; pinch fingers for zooming)
- Click on “download” – this will save the map in an offline area that you can use when you are not connected to the internet
The map is now saved in two places. To see this, click on the menu (three horizontal line on top right hand corner) in google maps:
- Click on “Your Places” from the menu, then select “Custom Map”. The map will be listed and you can use the map while connected to the internet
- Click on “Offline Maps” from the menu. The map will be listed to use the map offline ie: not connected to the internet (make sure location services is turned on and your will see the blue dot indicating your location as you navigate with the offline map)
- After you download a map, use the Google Maps app just like you normally would. If your Internet connection is slow or absent, or if you are in “airplane mode” Google Maps will automatically use your offline maps to give you directions